
DomainKeys Identified Mail (DKIM) is a method for email senders to digitally sign email messages in a way that can be verified by email receivers. This allows receivers to verify that the message truly came from the sender, and has not been tampered with. DKIM is intended to address some of the flaws in the existing email system, such as spoofing, phishing, and message tampering.
I. How to Setup DKIM for Freshdesk
- Access your Freshdesk account by logging in as a super administrator or administrator.
- To access advanced settings, go to Admin > Support Channels > Email Settings.
- Click on “Configure DKIM” under Advanced Settings.
- For the DKIM setting, Freshdesk creates 4 CNAME entries for each domain name. the data to your keyboard by copying it
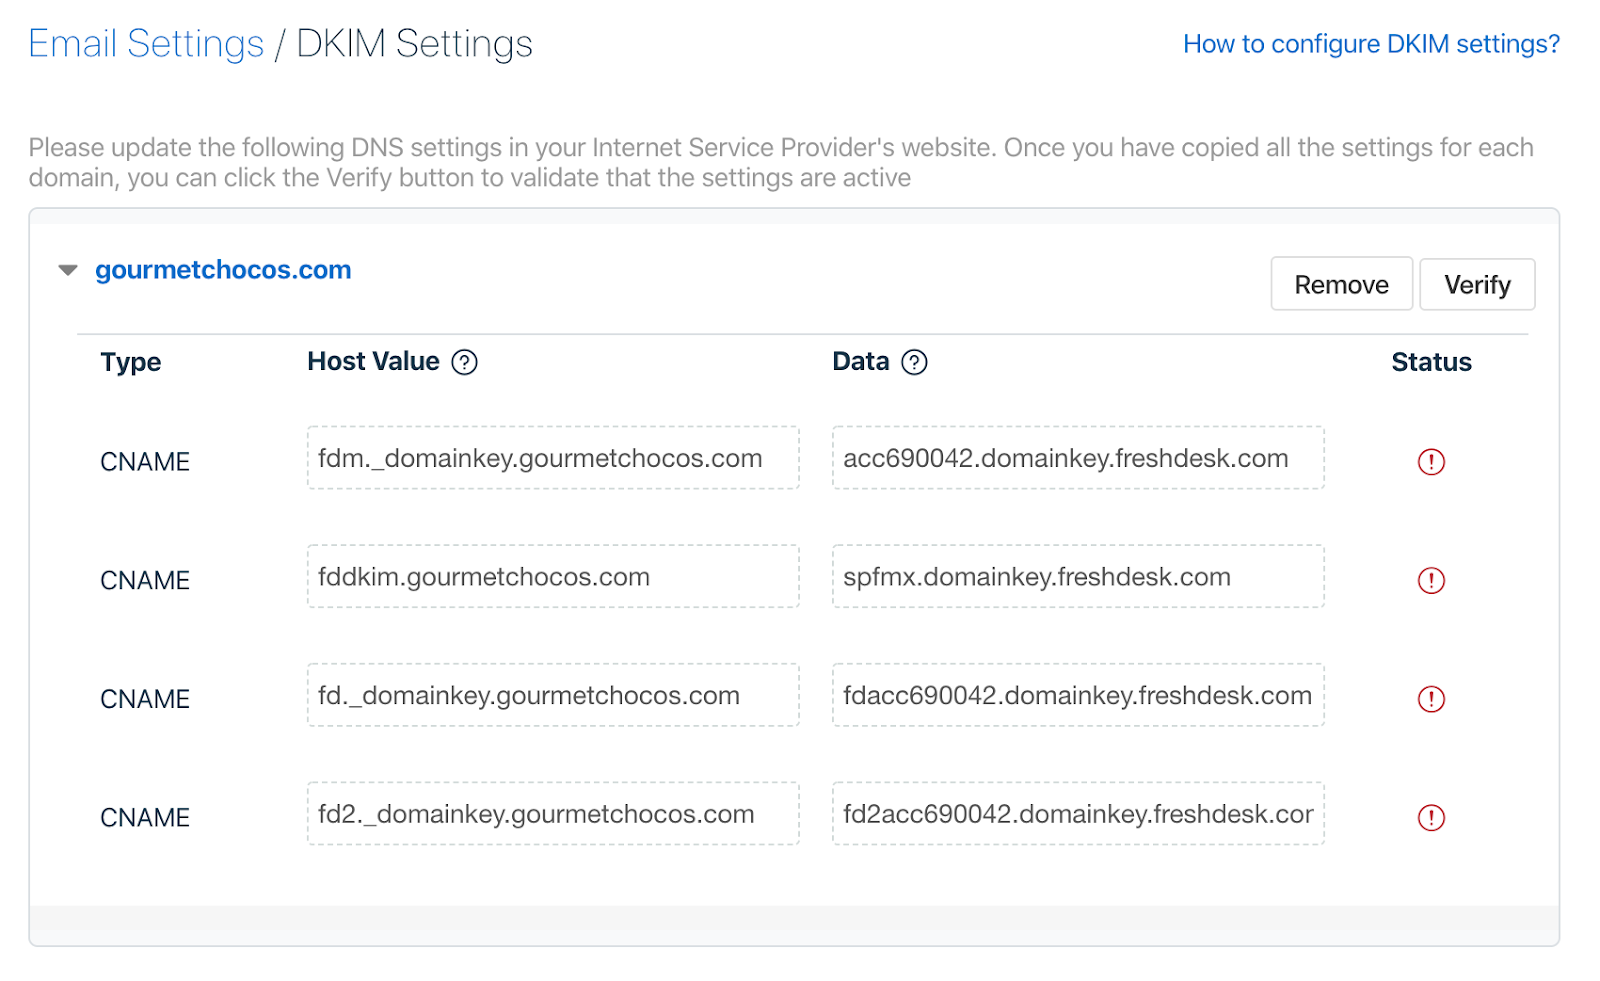
- Copy the CNAME records and paste them into the section designated for your unique domain in the DNS management console.
- Save changes
- Keep in mind that it may take some time for these changes to appear on your DNS.
- Reopen your Freshdesk account and, on the DKIM setup page, click the “Verify” next to your domain name.
- If you have correctly published the records in your DNS, you should be able to see a validated status for DKIM against your domain name.
You can use Skysnag’s free DKIM Checker to check the health of your DKIM record here
Enable DMARC for your domains to protect against spoofing. Sign up for a free trial today!
For more information on Freshdesk DKIM setup, you can refer to their reference documentation