
DKIM is specified in RFC 6376, and it is used by a number of email service providers, including Google, Yahoo, and Microsoft. DKIM is designed to address some of the flaws in the existing email system, such as spoofing, phishing, and message tampering. It allows email senders to digitally sign their messages in a way that can be verified by email receivers. This allows receivers to verify that the message truly came from the sender, and has not been tampered with.
I. Steps to Configure DKIM for Postmark
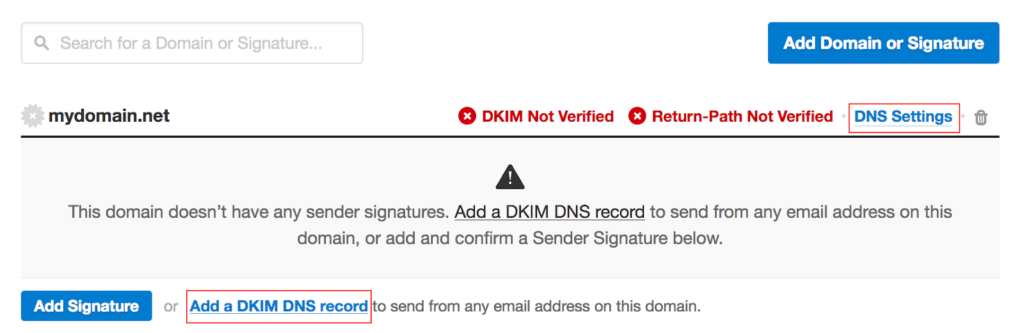
- Go to your Postmark account and log in.
- Select Sender Signatures.
- Choose either DNS settings or DNS for the domain you want to implement DKIM for.
- Configure a DKIM DNS record
- A DKIM record will be created by Postmark for your domain and will now be visible on your DNS settings page.
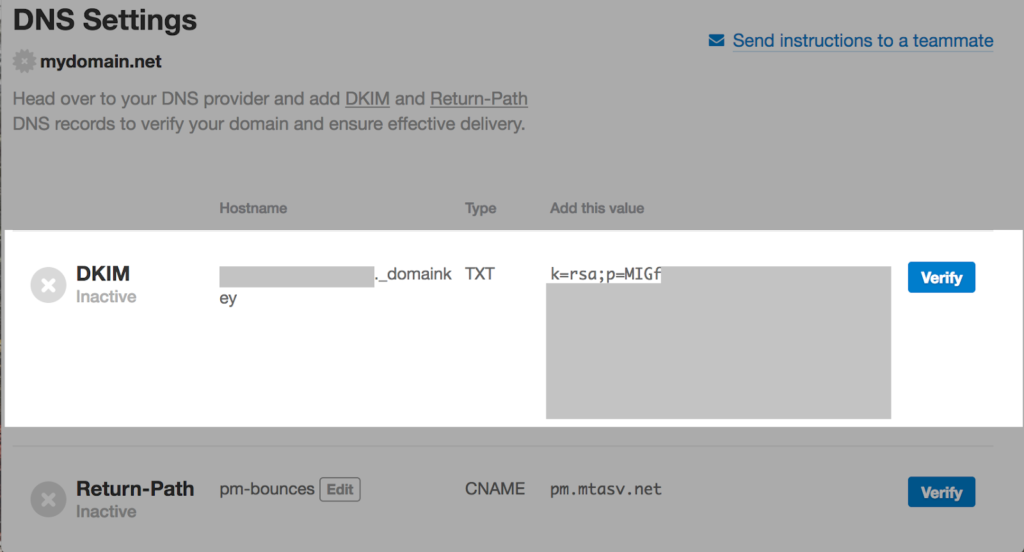
- Give your DNS some time to process the changes after publishing your domain’s hostname and DKIM public key on it.
- Log back into your Postmark account and select “Verify.”
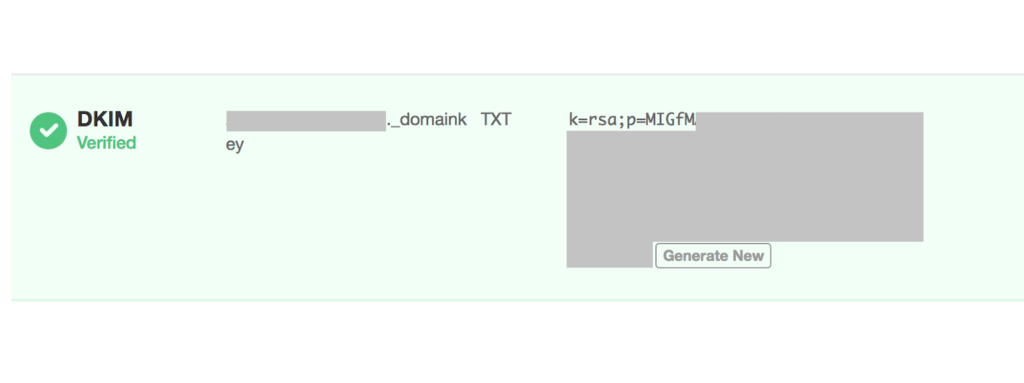
- You will be able to see a “Verified status” on Postmark as indicated below if your DKIM record is active and valid:
You can use Skysnag’s free DKIM Checker to check the health of your DKIM record here
Enable DMARC for your domains to protect against spoofing. Sign up for a free trial today!
For more information on Postmark DKIM setup, you can refer to their reference documentation