
DKIM uses cryptographic signatures and public-key infrastructure to verify that an email message has not been altered during transit and that it truly came from the claimed sender. Email senders can use DKIM to sign their messages by adding a DKIM-Signature header field to the messages. Email receivers can then use the public key published in the DNS to verify the signature and check that the message has not been tampered with.
I. How to Configure DKIM Records for SonicWall Email Security
- Navigate to Manage > Anti-Spoofing :
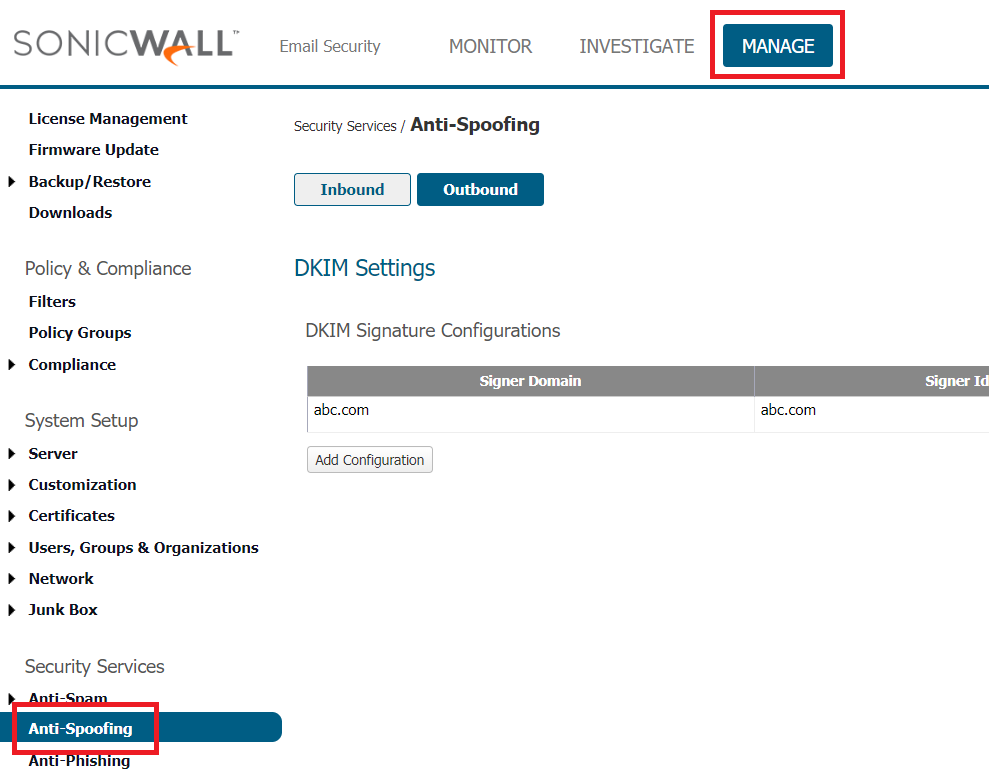
- Click “Add Configuration” under Outbound.
- To produce a public-private key pair, please enter the domain, identity of the signer, and selector. Then, save the settings in the dialogue box.

- After saving, you will be redirected to the Manage > Anti-Spoofing > Outbound page, as seen below.

- A new dialog box will popup after you click “generate,” as seen below:

- To copy the resulting record to your clipboard, click “Generate DNS Record.”
II. How to publish DKIM record in DNS for SonicWall Email Security
- Access your DNS administration interface.
- Create a TXT record with the following name in your DNS: ._domainkey, for instance: admin._domainkey.abc.com.
- Paste the copied DKIM public key contents in the section designated for the TXT record value.
- Click “Save.”
Use our free DKIM record lookup tool to validate the published DKIM record.
Enable DMARC for your domains to protect against spoofing. Sign up for a free trial today!
For more information on SonicWall Email Security DKIM setup, you can refer to their reference documentation