
DKIM uses cryptographic signatures and public-key infrastructure to verify that an email message has not been altered during transit and that it truly came from the claimed sender. Email senders can use DKIM to sign their messages by adding a DKIM-Signature header field to the messages. Email receivers can then use the public key published in the DNS to verify the signature and check that the message has not been tampered with.
I. Steps to Configure DKIM for OpenSRS
Step 1: Use our Free DKIM record generation tool to create a pair of DKIM public and private keys.

Step 2: Go to your DNS and insert the DKIM public key you created there under DNS records. Paste the created hostname for your domain in the Name/Host/Hostname field using resource type “TXT,” TTL as 1, and resource expiration time as 1 hour.
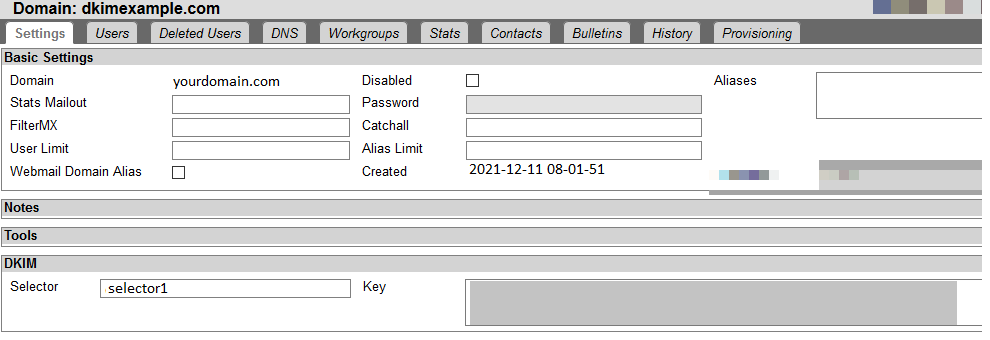
Step 3: Search for your domain in the top-left of the OpenSRS Mail Administration Console (MAC) window after logging in. Your domain overview page will show when you click on it; click on the DKIM section to make it larger. The “Key” and “Selector” fields can be found in the enlarged DKIM section. Paste your configured DKIM selector in the “Selector” field and your DKIM private key in the “Key” field.
Use our free DKIM record lookup tool to validate the published DKIM record.
You can use Skysnag’s free DKIM Checker to check the health of your DKIM record here
Enable DMARC for your domains to protect against spoofing. Sign up for a free trial today!
For more information on OpenSRS DKIM setup, you can refer to their reference documentation