Under Network & Content Delivery, click on Route 53.
Under DNS Management, go to Hosted Zones.
From the list, find the domain you want and click on it.
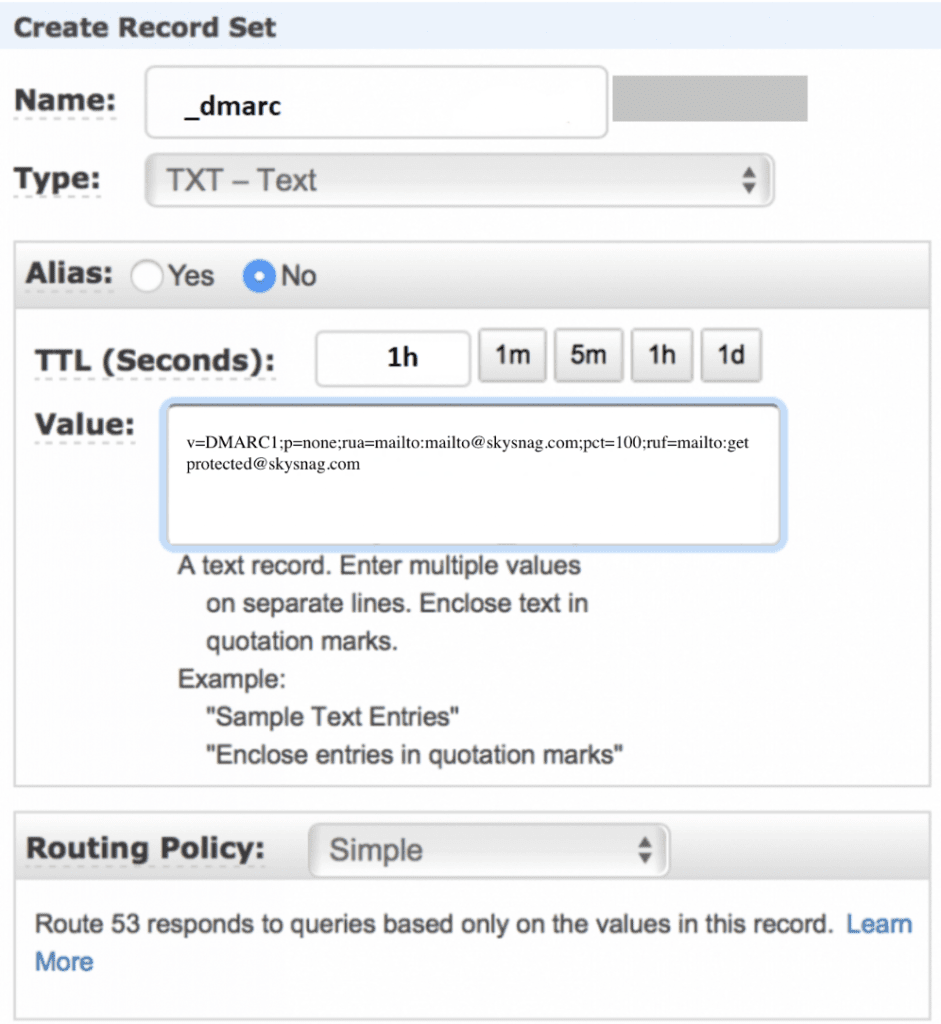
Click on the Create Record Set tab.
Choose Type: TXT
In the Name field, type “_dmarc”.
Create a Skysnag account to generate the DMARC record here
Copy the DMARC record that was sent to you and hover over to your AWS DMARC setup window to paste it in the “Value” field. (Note: the value shown below is only an example, please replace it with one that is generated for your domain)
Finish by clicking Create.
Check your published DMARC record using our DMARC checker tool, by simply entering your domain name in the box (e.g domain.com)
Skysnag helps busy engineers enforce DMARC, responds to any misconfigurations for SPF or DKIM which increases email deliverability, and eliminates email spoofing and identity impersonation.


 Under DNS Management, go to Hosted Zones.
 Under DNS Management, go to Hosted Zones.
 From the list, find the domain you want and click on it.
 Click on the Create Record Set tab.